

Beginner Guide to Specialty Coffee Cupping Techniques
Table of Contents
- What Coffee Cupping Is and Why It Matters
- Essential Coffee Cupping Tools for Your First Session
- Step-by-Step Coffee Cupping Techniques for Beginners
- How to Identify Coffee Flavor Notes Without Training
- Reading and Using a Coffee Cupping Score Sheet
- Best Practices for Home Coffee Tasting Sessions
- Common Cupping Mistakes and How to Fix Them
- Conclusion
- Frequently Asked Questions
Last Updated: September 19, 2026
What Coffee Cupping Is and Why It Matters
Coffee cupping is the standardized method roasters and buyers use to taste, score, and compare coffee. It uses the same dose, grind, water, and timing every time so the coffee, not the brewer, does the talking.
That matters more than most beginners expect. Cupping is how you learn to taste deliberately instead of just drinking what's in front of you.
The process follows a set of industry standards maintained by the [Specialty Coffee(/blogs/news/how-to-identify-high-quality-specialty-coffee-beans) Association cupping protocol | sca.coffee]. Those rules exist so two tasters in different rooms can compare notes and land on the same score.
Why cupping beats casual tasting
- It removes variables like brew method and grind size
- It exposes defects and bitterness fast
- It builds a shared language for flavor
Essential Coffee Cupping Tools for Your First Session
You don't need a lab. The essential coffee cupping tools are a scale, a grinder, a kettle, a timer, and matching cups. Everything else is optional.
The Minimum Setup
- Digital scale accurate to 0.1 grams
- Burr grinder for a consistent medium-coarse grind
- Gooseneck kettle for controlled pouring
- Timer for consistent steep times
- 5 to 6 identical cups so every sample gets the same treatment
- Cupping spoons with deep bowls for slurping
Optional Upgrades
A thermometer helps if your kettle runs hot. A notebook or a printed score sheet keeps your notes organized. Small bowls for the grounds let you smell the dry fragrance without making a mess.
If you want a shortcut to good raw material, a fresh sample pack removes the guesswork. The Single Origin Favorites Sample Pack gives you six small lots to cup side by side, which is exactly what a beginner needs.

Step-by-Step Coffee Cupping Techniques for Beginners
The full process takes about 15 minutes from grind to first sip. Here's how it runs.
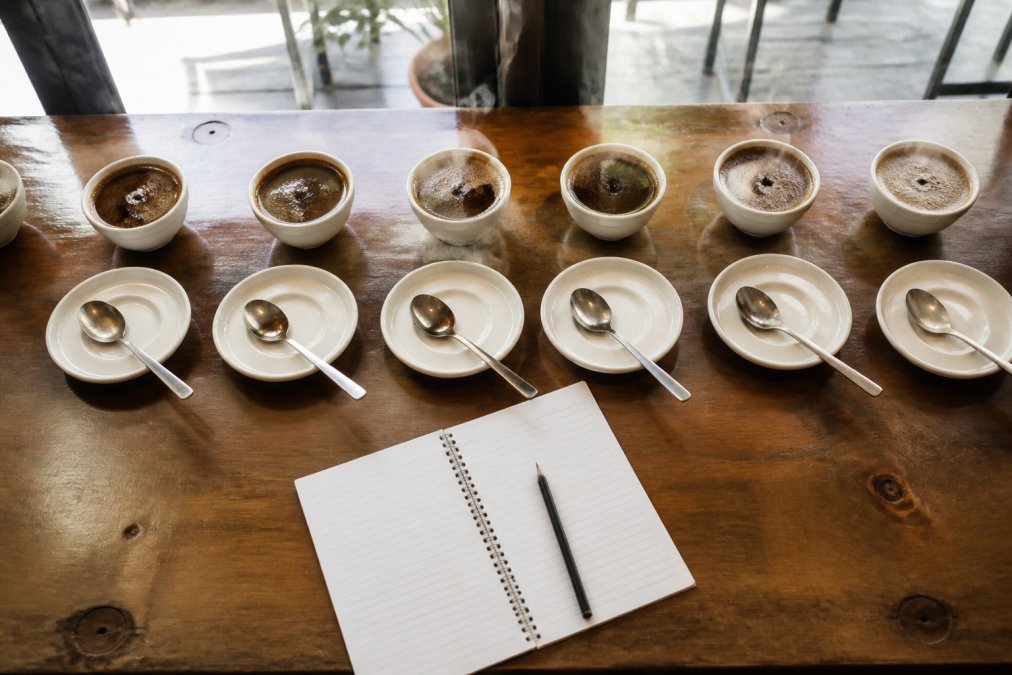
Step 1: Measure and Grind
Weigh 8.25 grams of coffee per cup. Grind to medium-coarse, about the texture of sea salt. Do this right before you cup, not the night before.
Step 2: Smell the Dry Fragrance
Lean in and smell the grounds before you add water. This is the dry fragrance. Write down the first thing it reminds you of, even if it sounds odd.
Step 3: Pour, Steep, and Break the Crust
Heat water to just off boiling, around 200°F (93°C). Pour over the grounds and start your timer. At four minutes, the grounds form a crust on top. Break it with your spoon and smell the burst of aroma that rises.
Step 4: Slurp and Evaluate
Skim the foam, then take a spoonful. Slurp it hard. The slurp spreads coffee across your whole tongue and pushes aroma up into your nose, which is where most flavor actually lives.
How to Identify Coffee Flavor Notes Without Training
Most guides tell you what to look for. Almost none tell you how to train the palate to tell a defect from a nuance. That distinction is the whole game, and it is learnable in a few weeks of short, deliberate practice.
Single Origin Favorites Sample Pack →
Defect versus nuance: the core skill
A defect is an off-flavor that reads as wrong regardless of preference. Common ones include:
- Phenolic or medicinal, band-aid, antiseptic, or iodine
- Rioy, a harsh, medicinal bitterness associated with specific defects in the green bean
- Earthy or musty, damp cellar, wet cardboard, or mold
- Ferment, overripe fruit pushed into vinegar or alcohol territory
A four-step palate training routine
- Anchor with reference tastes. Buy a small jar each of strawberry jam, dark chocolate, lemon, and toasted almond. Taste a tiny amount of each, then immediately smell and sip your coffee. Your brain starts building the bridge between the word and the sensation.
- Cup the same coffee three days running. Note what changes. Some flavors open as the coffee degasses; others fade. Learning the arc teaches you which notes are stable and which are noise.
- Compare two coffees side by side, never one alone. A washed Central American next to a natural Ethiopian makes acidity, body, and fruit pop in a way a single cup never will. This is why a rotating sample pack is the fastest training tool a beginner can own.
- Name the memory, not the "correct" term. If a coffee reminds you of your grandmother's plum jam, write that down. Specific personal memories are stickier than abstract descriptors, and they sharpen recall faster.
Why this works
Reading and Using a Coffee Cupping Score Sheet
The standard cupping form scores ten attributes, each on a vertical scale from 6 to 10 in quarter-point increments. The scorer circles a mark for each attribute, then adds the ten scores together. The total lands between 60 and 100. A separate defects column multiplies the number of defects by their severity and subtracts that from the total.

- Fragrance/Aroma, the smell of the dry grounds, then the smell of the wet slurry after water is added
- Flavor, the combined taste and aroma once the coffee is in your mouth
- Aftertaste, how long the positive flavor lingers after you swallow
- Acidity, the bright, lively quality; high is not the same as sour
- Body, the tactile weight, from thin and tea-like to heavy and syrupy
- Balance, whether the attributes above sit in harmony or one dominates
- Sweetness, the perceived sweetness level, not added sugar
- Clean Cup, absence of off-flavors from start to finish
- Uniformity, whether all five cups from the same sample taste the same
- Overall, your holistic impression of the coffee
What the numbers mean
A score of 6 means "good" for that attribute. A 7 is "very good," an 8 is "excellent," and a 9 is "outstanding." Most specialty lots land in the low-to-mid 80s once the ten attributes are summed. The commonly cited threshold for specialty coffee is 80 points or above. Below 80, the coffee is usually classified as commodity grade.
How to use the sheet as a beginner
Best Practices for Home Coffee Tasting Sessions
Keep the room quiet and free of strong smells. Perfume, cooking, and scented candles will wreck your sensitivity before you start.
Other habits that pay off:
- Cup in the morning, before your palate is tired
- Use filtered water, never tap
- Grind fresh for every session
- Limit yourself to four or five coffees at once
- Rinse your spoon between cups
Common Cupping Mistakes and How to Fix Them
The biggest mistake is tasting coffee that's too fresh. Roasted beans need to rest while they release gas. Cup a coffee the day it's roasted and the carbon dioxide will fight your palate and flatten every note.
| Mistake | Why It Hurts | The Fix |
|---|---|---|
| Cupping too soon after roast | Gas masks flavor and adds harshness | Wait several days after the roast date |
| Inconsistent grind | Uneven extraction skews every cup | Grind fresh with a burr grinder |
| Water too hot | Scorches the grounds and adds bitterness | Let the kettle cool slightly before pouring |
| Skimping on the slurp | Aroma never reaches your nose | Slurp hard and fast, every time |
| Tasting one coffee at a time | No reference point for comparison | Cup two or three side by side |
Conclusion
Cupping rewards patience. The technique is simple, but the payoff comes from doing it often and writing down what you find.
Frequently Asked Questions
Do I need special equipment to cup coffee at home?
No. A kitchen scale, a burr grinder, a kettle, a timer, and several identical cups are enough to start. A dedicated cupping spoon helps with slurping, but a large soup spoon works. For beans, try a sample pack like the Single Origin Favorites Sample Pack from Everything I Need to compare six origins side by side without committing to full bags.
How do I identify flavor notes in specialty coffee?
Start by smelling the dry grounds, then the wet aroma after pouring. Slurp forcefully to spread coffee across your palate. Compare what you taste to familiar foods: chocolate, citrus, berries, nuts. Use a flavor wheel as a reference. Practice with a washed process coffee and a natural process coffee side by side to notice how processing affects flavor. The more you cup, the faster your palate learns.
What is the 15-15-15 coffee rule?
The 15-15-15 rule is a cupping guideline: use 15 grams of coffee, 15 milliliters of water per gram (so 225 ml total), and steep for 15 minutes. Some variations use 15 grams, 150 ml water, and 15 minutes. The rule helps beginners remember ratios. Adjust grind and time to taste, but start here for consistent results.
How long should coffee beans rest before cupping?
Let roasted beans rest 24 to 72 hours before cupping. During this time, beans degas carbon dioxide, which can interfere with extraction and aroma. For light roasts, wait 3 to 5 days. Beans from Everything I Need are roasted to order and shipped fast, so by the time they arrive, they are often ready to cup. Check the roast date on the bag and aim for that window.