

Best Brewing Methods for High Altitude Coffee
Table of Contents
- Why High Altitude Changes How You Brew Coffee
- How to Brew Coffee at High Altitude: A Practical Adjustment Chart
- Method Comparison: Which Brewing Method Wins at Elevation
- A Pour-Over Coffee Recipe Tuned for High Altitude
- An AeroPress Coffee Recipe That Holds Up at Elevation
- Troubleshooting Weak or Under-Extracted Coffee at Elevation
- Choosing Beans and Equipment for Altitude Brewing
- Conclusion
- Frequently Asked Questions
Last Updated: October 14, 2026
Why High Altitude Changes How You Brew Coffee
If your coffee tastes thin and sour after a move to higher elevation, the water is usually why. Water boils at a lower temperature up high, so the best brewing methods for high altitude coffee adjust for that drop.
Water boils at 212°F at sea level and cooler the higher you climb. Hotter water pulls flavor from the grounds faster, so when your water tops out lower, your normal recipe under-extracts.
Water Boils at a Lower Temperature as Elevation Rises
The boiling point drops roughly 1.9°F per 1,000 feet: near 203°F at 5,000 feet, 197°F at 8,000 feet, and 194°F at 10,000 feet. Most brewing guides assume 195°F to 205°F; at elevation, a hard boil may not even reach the low end.
USDA food and water safety guidance
So the old advice to "let the water cool for 30 seconds after boiling" can push you too low, you may already start below target.
How High Altitude Coffee Brewing Temperature Affects Extraction
Extraction is dissolving flavor compounds from grounds into water, and heat drives it. Cooler water extracts slower and leaves flavor behind, causing under-extraction: a cup that tastes sour, salty, or weak. To brew coffee at high altitude without this problem, compensate: use more coffee, grind finer, and brew longer.
How to Brew Coffee at High Altitude: A Practical Adjustment Chart
Start with your normal recipe, then shift the variables below based on your elevation. The chart assumes a medium roast, a 1:16 baseline ratio, and a brew balanced at sea level.
Elevation |
Approx. Boil Point |
Grind |
Coffee-to-Water Ratio |
Brew Time |
|---|---|---|---|---|
Sea level |
212°F |
Baseline |
1:16 |
Baseline |
3,000 ft |
206°F |
Slightly finer |
1:15 |
+15 sec |
5,000 ft |
203°F |
Finer |
1:15 |
+30 sec |
7,000 ft |
199°F |
Finer |
1:14 |
+45 sec |
9,000 ft |
195°F |
Much finer |
1:14 |
+60 sec |
Treat this as a starting point, not a rule, the right adjustment depends on your grinder, roast level, and heat loss. Taste every cup and change one variable at a time.
Why These Numbers, Not Others
Cooler water extracts slower, so you compensate on three fronts:
- Grind finer to increase surface area and contact points per second.
- Tighten the ratio (more coffee per unit of water) so the cup still has enough dissolved solids even if extraction efficiency drops.
- Extend brew time so the water has longer to work.
Keep each change small: stacking large adjustments on all three overshoots into bitterness, and you cannot tell which variable caused it.
Adjust by Method, Not Just by Elevation
The chart covers immersion and pour-over, but the two families respond differently:
- Immersion (French press, Clever Dripper): lean on brew time first. Add 30-60 seconds before changing grind; immersion is forgiving because the grounds stay submerged.
- Pour-over (V60, Kalita, Chemex): lean on grind first. A finer grind slows the drain and increases contact time automatically.
- AeroPress: lean on steep time and a slightly finer grind. Pressure covers the rest.
A Repeatable Test Protocol
Guessing at altitude gives you a different cup every morning. Use this loop:
- Lock your dose. Weigh coffee to 0.1 g. Do not eyeball it.
- Measure your water temperature. An instant-read thermometer tells you what your kettle is actually doing.
- Brew your baseline recipe at your current elevation and taste it.
- Change one variable. Grind one step finer, or add 30 seconds, or tighten the ratio by one point. Not all three.
- Taste again. If it moved toward sweet and balanced, keep the change. If it went bitter or dry, back it off.
- Write it down. Grind setting, dose, water weight, temperature, and total time.
Two or three iterations usually get a recipe into a good range; after that, the log does the work.
Reading the Cup: What the Taste Is Telling You
- Sour, sharp, or salty: under-extracted. Grind finer or add time.
- Weak or watery: under-extracted or under-dosed. Tighten the ratio to 1:14 and retaste.
- Bitter, dry, or ashy: over-extracted. Grind coarser or shorten the brew.
Method Comparison: Which Brewing Method Wins at Elevation
No single method wins everywhere. At elevation, what matters most when water tops out below 200°F is control over contact time and temperature retention. The table scores the main methods on those axes, plus portability and consistency.
Method |
Temperature sensitivity |
Contact-time control |
Portability |
Consistency at elevation |
|---|---|---|---|---|
French press |
Low |
High (steep as long as you want) |
Medium (glass is fragile) |
High |
Clever Dripper |
Low |
High |
Medium |
High |
Pour-over (V60, Kalita) |
High |
Medium (drain rate limits you) |
Medium |
Medium |
AeroPress |
Low |
High |
High |
High |
Moka pot |
Medium |
Low (fixed cycle) |
Medium |
Medium |
Cold brew |
None (no heat) |
Very high |
Low (needs 12-18 hrs) |
Very high |
Lower temperature sensitivity means less fighting the boil point; higher contact-time control makes it easier to compensate for cooler water.
Immersion Brewing: French Press and Clever Dripper
Immersion brewing steeps grounds directly in water, then separates them. The French press and Clever Dripper are the most forgiving options at altitude because steep time is a dial you can turn without touching grind or ratio.
- French press: Full immersion, rich body, easy to extend steep time. A 4-minute steep at sea level becomes 4:30-5:00 above 5,000 feet. The metal mesh lets some fines through, which adds body but can muddy a light roast.
- Clever Dripper: Immersion plus a paper filter, cleaner cup, simple to control.
A common mistake is under-steeping at elevation. Add 30 to 60 seconds and stir once at the start so cooler water reaches every ground evenly.
Pour-Over and AeroPress at Elevation
Pour-over gives the most control over pour pattern and flow rate, but punishes low temperatures because water passes through quickly. At 7,000 feet, a V60 that drained in 2:45 at sea level may finish in 2:15.
The AeroPress sits in the middle: immersion plus pressure. Pressure does mechanical work heat would otherwise do, so it extracts well even with cooler water.
Cold Brew and Moka Pot: The Two Extremes
Cold brew sidesteps altitude entirely because it never relies on heat. A 12- to 18-hour room-temperature steep extracts evenly regardless of boil point. The trade-off is planning: you cannot decide at 7 a.m. that you want cold brew at 7:15.
The moka pot is the opposite case. It depends on steam pressure from a boil, so at elevation it runs cooler and often stalls before the water is fully pushed through.
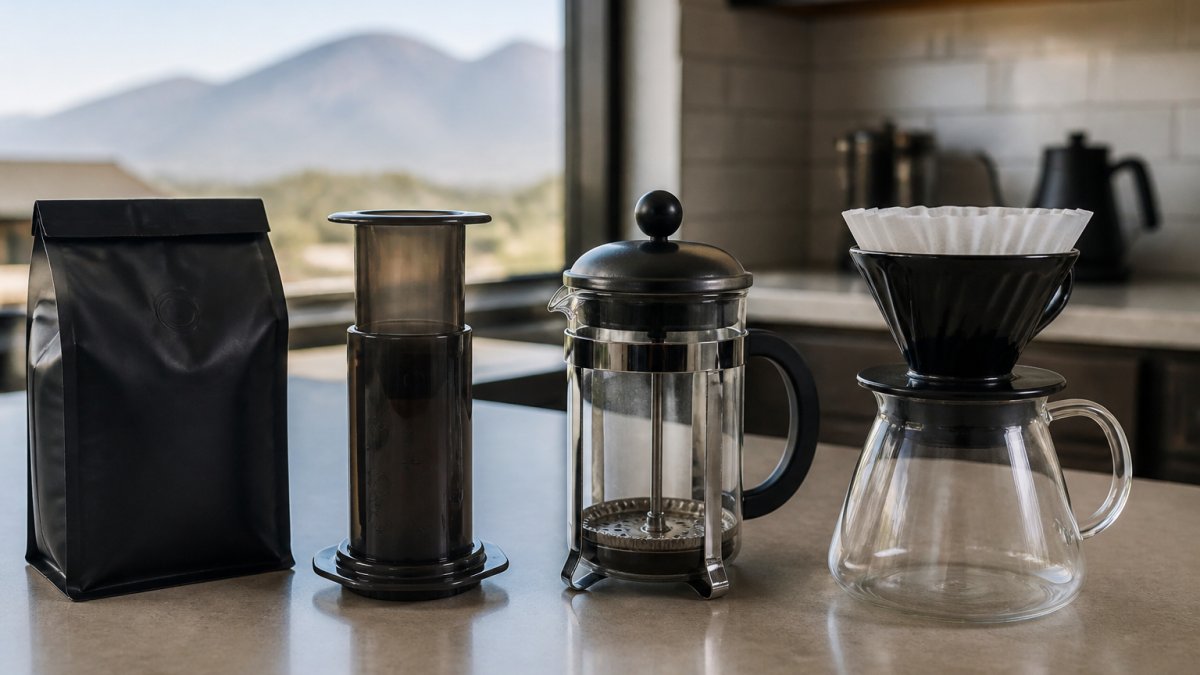
How to Choose
- You want the easiest fix tonight: French press or Clever Dripper. Add steep time, taste, adjust grind.
- You want the brightest, most defined cup: Pour-over, but commit to a finer grind and a slower pour.
- You travel or camp above 6,000 feet: AeroPress. It tolerates a weak boil better than any other method here.
A Pour-Over Coffee Recipe Tuned for High Altitude
This pour-over recipe assumes brewing above 5,000 feet. Grind finer if the cup still tastes sour.
What you'll need:
- 22g coffee, ground medium-fine
- 350g water, just off the boil
- Pour-over dripper and paper filter
Steps:
- Rinse the filter with hot water to preheat.
- Add grounds and level the bed.
- Pour 60g water to bloom. Wait 45 seconds.
- Pour in slow circles to 350g total.
- Let it drain fully. Target 3:30 to 4:00 total.
The longer time makes up for the cooler water. If it drains faster, grind finer.
An AeroPress Coffee Recipe That Holds Up at Elevation
This AeroPress coffee recipe uses a finer grind and longer steep, which extracts well even when water tops out below 200°F.
What you'll need:
- 17g coffee, ground fine
- 220g water, just off the boil
- AeroPress and paper filter
Steps:
- Preheat the AeroPress and your cup.
- Add grounds, then pour to 220g.
- Stir 10 times. Steep for 1:30.
- Press slowly over 30 seconds.
- Top with hot water if you want a longer cup.
Pressure does extra work here, pushing water through the grounds even when heat is limited, that is why the AeroPress is so reliable up high.
Troubleshooting Weak or Under-Extracted Coffee at Elevation
Sour, weak coffee almost always means under-extraction. Fix it by changing one variable at a time, then tasting again.
- Tastes sour or salty? Grind finer. The water is not pulling enough out.
- Tastes weak or watery? Use more coffee. Try a 1:14 ratio.
- Tastes thin? Steep longer. Add 30 to 60 seconds.
- Tastes bitter? You went too far. Grind coarser or shorten the time.
Keep a simple log of grind, ratio, and time, and repeat what works.
Choosing Beans and Equipment for Altitude Brewing
Good water and beans matter more at elevation. Cooler water is less forgiving, so start with coffee that already tastes sweet and clean.
Look for high-grown coffee, also called high-altitude coffee.
For a bright, clean cup, try our Peru single origin, with notes of green apple and honey. For something bolder, the Asian Plateau Blend brings earthy depth and brown sugar sweetness.


For travel or backcountry brewing, the Instant Coffee dissolves in hot or cold water, so a lower boil point is no obstacle.

Instant Coffee
Gear basics that help at elevation:
- A digital scale for repeatable ratios
- A gooseneck kettle for controlled pouring
- A thermometer to check brew temperature
- A burr grinder for consistent grind size
Freshly roasted beans make the biggest difference.
Conclusion
Brewing at elevation has a simple answer: your water is cooler, so your recipe has to work harder. Adjust grind, ratio, and time, and the cup comes back into balance.
That is where Everything I Need helps. We source beans from high-elevation estates and roast to order with precision thermal mapping, so sweetness and aroma are already there before you brew.
Get started with Everything I Need and brew a cup that tastes as good at 7,000 feet as at sea level.
Frequently Asked Questions
Does high altitude change how coffee should be brewed?
Yes. At elevation, water boils at a lower temperature, so a standard pour-over or French press recipe that works at sea level can leave your cup tasting weak or sour. The fix is usually a finer grind, a longer brew time, and a slightly higher coffee-to-water ratio. If you are brewing high altitude coffee beans, those beans were grown at elevation but still need adjusted brewing once you bring them home.
How should I adjust grind size when brewing high-altitude coffee?
Go finer than you would at sea level. A finer grind gives the cooler water more surface area to work with, which helps pull out sweetness and body before the brew finishes. For pour-over, move one or two clicks finer on your grinder. For French press, a medium-fine grind works better than the coarse grind most recipes call for. Taste the result and adjust in small steps.
Does water boil at a lower temperature at high elevations?
Yes. Water boils at a lower temperature as elevation increases because atmospheric pressure drops. At sea level, water boils at 212°F. At 5,000 feet, it boils closer to 203°F. At 8,000 feet, it drops to about 197°F. That lower boiling point means your brew water tops out cooler, which slows extraction and can leave coffee tasting thin or under-developed.
Which brewing method works best for high-altitude coffee?
Immersion methods like the French press and Clever Dripper tend to perform most consistently at elevation because you control the steep time directly. Pour-over and AeroPress also work well once you adjust grind size and brew time. Cold brew sidesteps the boiling point issue entirely since it never uses hot water. The best method is the one you can adjust repeatably. Try one method, change one variable at a time, and keep notes.