

How to Get Thick Crema on Home Espresso: 2026 Guide
Table of Contents
- What You'll Need Before You Start
- Step 1: Start With Fresh Beans for Thick Crema
- The Best Coffee Beans for Espresso Crema
- Step 2: How to Dial In Espresso Grind Size
- Step 3: Puck Prep, Tamping, and Distribution
- Step 4: Nail Your Espresso Extraction Time for Crema
- Step 5: Water Temperature, Pressure, and Your Machine
- Basket Type and Pressure Profile: The Variables Most Guides Skip
- Frequently Asked Questions
Last Updated: September 27, 2026
What You'll Need Before You Start
Thick crema starts with the right setup, not luck. If your shots come out thin and pale, the fix is usually one of five things: bean freshness, grind, puck prep, extraction time, or machine pressure. This guide from Everything I Need walks through each one.
Here's what to have ready before you pull a single shot:
- Freshly roasted beans with a visible roast date
- A burr grinder you can adjust in small steps
- A digital scale that reads to 0.1 grams
- A tamper that matches your basket size
- A distribution tool or a paper clip for stirring
- A timer or a scale with a built-in timer
- Filtered water and a way to check its temperature
You do not need an expensive machine to get thick crema on home espresso, you need control over the variables. Most home setups can pull a syrupy, golden-brown shot once they line up.
Step 1: Start With Fresh Beans for Thick Crema
Fresh beans are the single biggest lever you control. Crema is mostly carbon dioxide trapped in the coffee oils, and that gas only exists in recently roasted beans. As beans sit, they degas and lose the pressure that creates foam, so you can grind perfectly and still get a flat, thin shot.
- Best window: roughly 5 to 21 days after the roast date
- Too fresh: beans under 4 days old can gush and taste sharp
- Too old: past 4 weeks, crema fades fast no matter what you do
Check the roast date, not the best-by date. A "best by" stamp tells you almost nothing about freshness.
Why Roast Date Matters More Than Roast Level
Roast date beats roast level for crema. A medium-dark roast pulled three days off the roaster will out-foam a dark roast that's been on a shelf for two months, gas content is the driver, and time drains it.
Roast level still shapes texture: darker roasts build crema more easily because the oils sit closer to the surface, while lighter roasts demand tighter control over grind and temperature. Buy fresh first, then pick your roast level to match the flavor you want.
The Best Coffee Beans for Espresso Crema
The best beans for crema are fresh, medium-dark, and often a blend that includes some Robusta. Arabica brings sweetness and complexity; Robusta brings body and stable foam.
Robusta outperforms Arabica on crema because it carries roughly twice the caffeine and significantly more chlorogenic acid, both of which break down during roasting into the CO2 and lipid-soluble gases that inflate crema. Its thicker cell walls also release that gas more slowly, so the foam holds its shape for minutes rather than seconds.
That is why traditional Italian espresso blends typically run 10 to 30 percent Robusta. A 100 percent Arabica shot can produce crema, but it tends to be lighter, thinner, and quicker to collapse. For a dense, persistent layer, a blend is the practical choice.
Arabica vs. Robusta Blends
Arabica alone can make a lovely shot, but it often produces a lighter, less persistent crema; Robusta adds stability because it carries more of the compounds that hold foam together.
A blend is the practical choice for most home setups. A common starting ratio is 80/20 Arabica to Robusta; adjust from there based on how much crema persistence you want versus how much brightness you will trade away.
High-Elevation Origins and Altitude
Altitude affects bean density. At higher elevations, lower atmospheric pressure and cooler temperatures slow the cherry's development, so the bean packs more mass into the same volume. That density translates to a slower, more even extraction: a dense bean holds its puck structure better under 9 bar of pressure, which reduces channeling and produces a more uniform crema. Low-altitude beans are less dense and can extract unevenly, giving you a patchy crema that breaks apart quickly.
Higher-grown beans also tend to carry brighter acidity and clearer flavor notes. When comparing bags, look for the elevation range on the label, anything above roughly 1,200 meters is considered high-grown. That is not a guarantee of thick crema on its own, but it is a useful signal of the structural density to support one.
Step 2: How to Dial In Espresso Grind Size
Grind size is the most important adjustment for how to dial in espresso grind size, and it decides whether your shot runs fast or slow. Too coarse and water races through, leaving thin, pale crema; too fine and the shot chokes, turning bitter and burnt. Adjust in small steps, one notch at a time, pulling a shot after each change.
- Shot runs under 20 seconds: grind finer
- Shot runs over 35 seconds: grind coarser
- Shot tastes sour: grind finer
- Shot tastes bitter or ashy: grind coarser
Use a burr grinder, not a blade grinder.
Step 3: Puck Prep, Tamping, and Distribution
Even puck prep separates a good shot from a great one. Water always finds the path of least resistance, so any crack or gap in the puck becomes a channel, pushing water through one spot and leaving the rest under-extracted, which thins your crema.
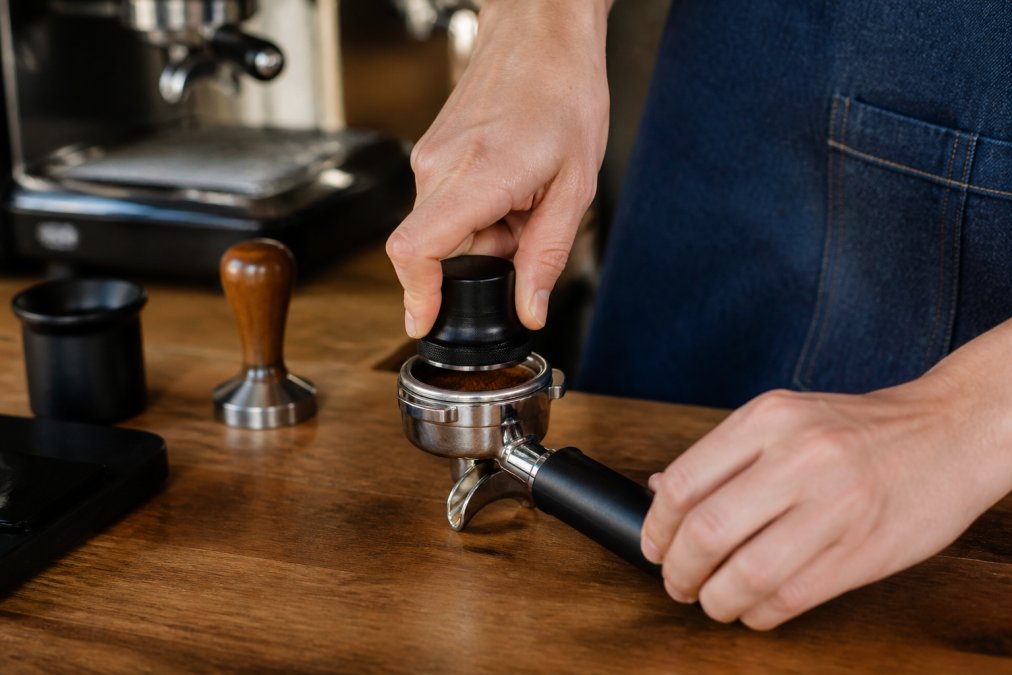
Follow this order every time:
- Dose your ground coffee onto the scale
- Stir with a distribution tool to break up clumps
- Level the bed without pressing down
- Tamp straight down with steady, even pressure
- Wipe the rim and lock the portafilter in
Step 4: Nail Your Espresso Extraction Time for Crema
Espresso extraction time for crema should land between 25 and 30 seconds for a standard double shot, enough contact time to pull oils and gas into a stable foam without scorching the coffee. A shot that finishes in 15 seconds means the grind is too coarse or the dose too low; past 40 seconds, the grind is too fine. Both extremes thin out the crema.
Dose, Yield, and the 1:2 Ratio
The classic starting point is a 1:2 ratio: 18 grams of coffee in, 36 grams of espresso out. This gives you a balanced, full-bodied shot with a thick layer on top.
| Variable | Target | If Off |
|---|---|---|
| Dose | 18 g | Adjust grind, not dose |
| Yield | 36 g | Stop shot earlier or later |
| Time | 25-30 sec | Change grind size |
| Ratio | 1:2 | Adjust to taste |
Step 5: Water Temperature, Pressure, and Your Machine
Water temperature and machine pressure set the ceiling on your crema. Most home machines aim for roughly 200°F at the group head, and standard espresso pressure sits near 9 bar.
Basket Type: The Variable Most Guides Skip
The basket in your portafilter comes in two types, and they produce fundamentally different foam.
Pressure Profile and Pre-Infusion
Some machines ramp pressure up and down during the shot rather than holding a flat 9 bar. A gentle pre-infusion lets the puck soak evenly before full pressure hits, which reduces channeling and can deepen the crema. If your machine offers pre-infusion, use it.
Milk Steaming and Crema Perception
One more factor most people miss: milk steaming. Steaming pulls some of the crema into the pitcher and breaks the surface layer, so if you pour a flat white and the crema seems to vanish, it is the pour, not your shot. Taste the espresso straight first to judge the crema on its own.
Basket Type and Pressure Profile: The Variables Most Guides Skip
Learning how to get thick crema on home espresso comes down to control: fresh beans, a consistent grind, even puck prep, and the right time, temperature, and pressure. Nail those and the golden-brown layer follows.
Frequently Asked Questions
Why is my espresso crema too thin?
Thin crema usually traces back to stale beans, a grind that is too coarse, or water temperature that is too low. Beans roasted more than four weeks ago have lost most of the carbon dioxide that creates crema during extraction. If your beans are fresh, check your grind size and aim for a 25-30 second shot. A pressurized basket can also mask thin crema by faking foam, so verify which basket type your machine uses.
Does bean freshness affect the thickness of espresso crema?
Yes, freshness is the single biggest factor. Coffee beans release carbon dioxide for roughly two to four weeks after roasting, and that gas is what forms the bubbles in crema. Beans past their roast date produce flat, pale shots no matter how well you dial in your grind. Look for a roast date on the bag, not a best-by date, and use beans within two to three weeks of roasting for the thickest results.
How do I make my espresso shot thicker?
Start with freshly roasted beans that include some Robusta in the blend, since Robusta produces more stable crema than Arabica alone. Then tighten your grind until you hit a 1:2 dose-to-yield ratio in 25-30 seconds. Use a distribution tool and tamp level with about 30 pounds of pressure. If crema is still weak, check that your machine reaches 9 bar and that your water temperature sits between 195°F and 205°F.
Why am I not getting good crema on my espresso?
The most common culprits are old beans, a grind that is too coarse, or a machine that cannot hold 9 bar of pressure. Pressurized baskets also produce a foam-like layer that looks like crema but collapses quickly. Check your roast date first, then adjust grind size in small steps. If your machine uses a pressurized basket, switching to a non-pressurized basket with fresh beans will give you real crema instead of foam.